Shrinking a QNAP Virtualization Station disk image
It’s not possible to shrink a disk image with QNAP’s Virtualization Station (as of version 3). Even growing it might not work through the QNAP UI depending on the details of the disk image. Here’s how to do it manually with qemu-img.
Preparation
- Create a backup of all data and check that it works. Messing with filesystems and disk images is a great way to corrupt your data.
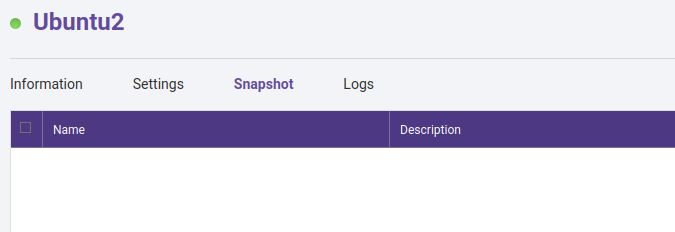
- Check that there are no snapshots of the VM for which you want to manipulate the disk image (in one case I noticed a snapshot was created without me noticing it):
- Decide how large the partitions on the disk and the disk itself should be. Use
fdisk -l,gdisk -l /dev/vda(for GPT disks),df -hor other tools.- In this example there is one LVM partition with a root and swap logical volume inside. I decided 645 GiB for the root logical volume and 650 GiB for the LVM physical volume and partition should be enough.
# fdisk -l
[...]
Device     Boot Start        End    Sectors Size Id Type
/dev/vda1  *     2048 4294967295 4294965248   2T 8e Linux LVM


Disk /dev/mapper/nicoloud--vg-root: 2 TiB, 2197995651072 bytes, 4292960256 sectors
Units: sectors of 1 * 512 = 512 bytes
[...]

Disk /dev/mapper/nicoloud--vg-swap_1: 976 MiB, 1023410176 bytes, 1998848 sectors
[...]
# df -h
Filesystem                     Size  Used Avail Use% Mounted on
[...]
/dev/mapper/nicoloud--vg-root  2.0T  523G  1.4T  28% /
- Now is a good time to boot the VM for which you want to manipulate the disk image into GParted Live or another similar image. This is particularly necessary when you want to shrink an ext4 filesystem. Growing it, or e.g. shrinking the physical volume when the filesystem itself is already small enough, is possible online, but it does not hurt to boot into GParted Live anyway.
- Using e.g. a Ubuntu Live image is also possible but probably needs more RAM (I only had 1 GiB available for this VM at the time).
Resizing the filesystem, LVM logical volume, LVM physical volume, and partition
- Resize the filesystem and logical volume in one go (ext4 is definitely supported by the LVM tools – for other filesystems you might have to check):
lvresize --resizefs --size 645G nicoloud-vg/root- Of course you can also run
e2fsckandresize2fs(or the analogous commands for another filesystem) yourself
- Of course you can also run
- Resize the physical volume:
pvresize --setphysicalvolumesize 650G /dev/vda1- Of course you need to make sure all logical volumes fit inside this.
- If
pvresizegives you an error in the direction ofcannot resize to XYZ extents as later ones are allocatedalthough your physical volume size would have enough space for all logical volumes, then it is possible that the current physical extents make it impossible to shrink the physical volume. This can happen if e.g. the free space is at the start or middle of the physical volume instead of concentrated at the end.- You can diagnose an issue like this with
pvs -v --segments /dev/vda1and fix it withpvmove. Here is an example:
- You can diagnose an issue like this with
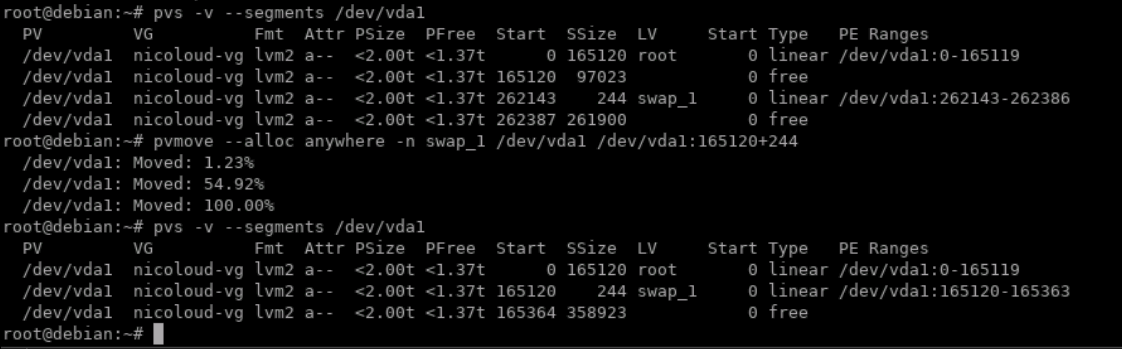
- After fixing such issues,
pvresizeshould work:

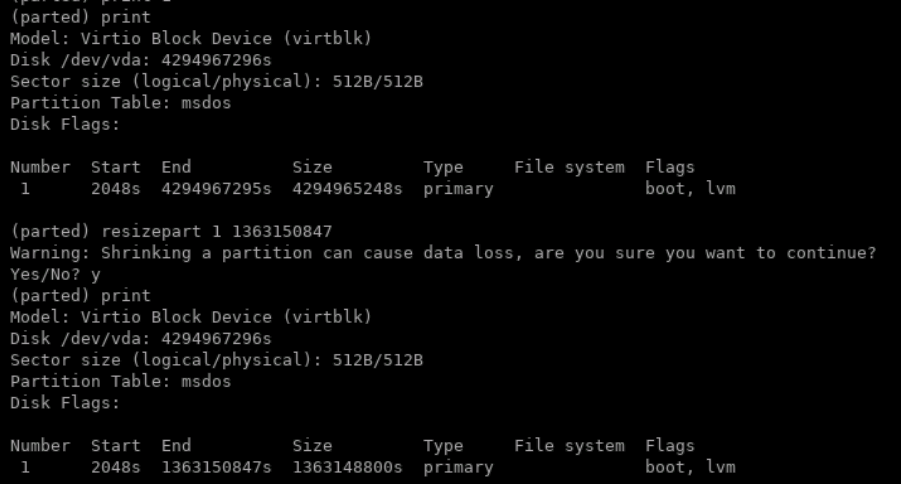
- Note down the new size in sectors that
pvresizegives you. In this case it’s 1363148800 sectors. - Start
parted, set the unit to sectors, and print the partition information:
# parted /dev/vda1
unit s
print
- Calculate the end sector of the partition with “start_sector + size in sectors (from
pvresizeabove) – 1″ - Actually resize the partition with parted using
resizepart PART_NUM END_SECTOR - Here is an example of the partition resize process:
- So far so good. Well, hopefully. Now is a good time to check the filesystem again and boot into your normal VM OS to see everything is still working. The reduced size should now be visible everywhere – except that the disk is still larger than the partitions on it.
Resizing the disk image with qemu-img
- First you need to login to the QNAP system via SSH. Then enter Q and Y to get to a normal shell environment.
- Check where the
qemu-imgbinary is. On my QNAP, it is at/share/CE_CACHEDEV1_DATA/.qpkg/QKVM/usr/bin/qemu-img. To have it available without writing the full path, create a symlink like withln -s /share/CE_CACHEDEV1_DATA/.qpkg/QKVM/usr/bin/qemu-img /usr/sbin/qemu-img. - Navigate to the folder with the disk image. Check again that the VM is turned off and there are no snapshots.
- Check that the disk image information makes sense to you with
qemu-img info Ubuntu.img - Resize the disk image so that there is still enough space for all partitions with e.g.
qemu-img resize --shrink Ubuntu.img 651G- This command may have to run for quite a while. You can open another SSH connection and check with
topthat theqemu-imgcommand is still running normally if you like.
- This command may have to run for quite a while. You can open another SSH connection and check with
- An example of the process:
# qemu-img info Ubuntu.img
image: Ubuntu.img
file format: qcow2
virtual size: 2 TiB (2199023255552 bytes)
disk size: 1.02 TiB
cluster_size: 65536
Format specific information:
    compat: 1.1
    lazy refcounts: false
    refcount bits: 16
    corrupt: false
# qemu-img resize --shrink Ubuntu.img 651G
Image resized.
# qemu-img info Ubuntu.img
image: Ubuntu.img
file format: qcow2
virtual size: 651 GiB (699005927424 bytes)
disk size: 588 GiB
cluster_size: 65536
Format specific information:
    compat: 1.1
    lazy refcounts: false
- Ideally, you are now done and can check the filesystem. This was the case for me with a disk image that only used an MBR.
- In the case of a disk image using GPT, after resizing it seemed like the disk was corrupted and booting was not possible anymore. When trying to boot my original OS, it could not find the physical volume. When starting GParted Live, I got errors like
Invalid argument during seek for read on /dev/vda(from GParted)fdisk -l /dev/vdagave one hint:GPT PMBR size mismatch (old_size_xyz != new_size_abc) will be corrected by write.but did not list the partitions correctly. Note thatfdiskis not appropriate for GPT disks anyway.gdisk -l /dev/vdawas the most helpful. It listed the disk’s partitions correctly (after complaining) and said:Disk size is smaller than the main header indicatesinvalid backup GPT header
- It makes sense that the backup/secondary GPT header and partition table were corrupted because they are at the end of the disk (which we cut off with
qemu-img resize). - Everything could be fixed by copying the primary GPT header and entries (which are the front of the disk) to the end with
sgdisk -e /dev/vda. This also took care of the size issues along the way.
Leave a Reply